In my previous blogs I shared, how to get started with Arduino and Servos. In this article we will see how to control a pan-tilt mechanism using servos and a joystick module. So without any further ado, let’s begin.
Requirements:
For this project we will need a microcontroller, I will be using Arduino UNO but any version will work. Two servos and a joystick module. I have used joysticks salvaged from old PS controller but you can buy a module for pretty cheap. Also we need a pan-tilt mechanism, its easy to build one or even 3D print but I bought a readymade one online. So to list it down , here are the things we need:
- Arduino UNO
- Two 9G servos
- Joystick module
- Pan-Tilt mechanism
After everything is gathered, we will move on to make assemble the pan-tilt mechanism.
Assembling Pan-Tilt:
The assembly process is very straight forward, and most mechanisms will come with an instruction manual. Here is how the kit looks like:

If you want a detailed instructions on how to assemble the kit, you can check out this tutorial.
Understanding the Joystick:
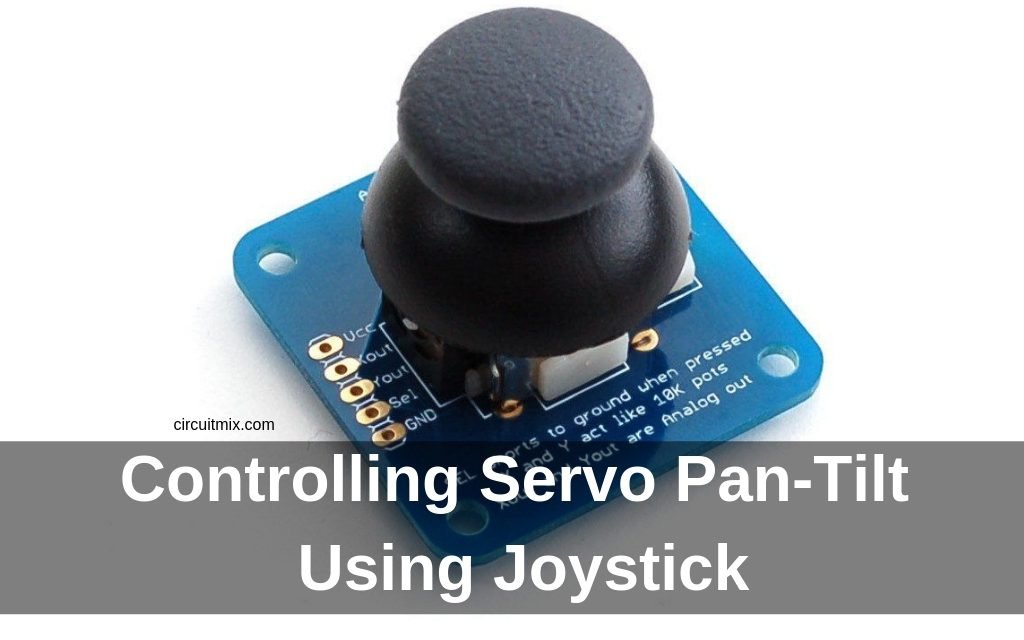
Before making the connections and uploading a code, we need to understand how a joystick module works. Below is an image of common Joystick module available for Arduino and Raspberry Pi projects:

Notice that there are pins labelled Vcc, Xout, Yout, Sel and Gnd. We will be using all of these pins except Sel, it is a switch which shorts to ground when the joystick is pressed down. We don’t need this switch for the project. Most joystick modules should look similar.
The one I used is salvaged from old PlayStation controller. Here is how it looks, if you want to use same:

The unlabelled pins belongs to switches which are not required for this project. Both Joysticks work in a similar way, there are two 10k potentiometers one for X-axis and other for Y-axis. Moving the joystick around generates different PWM values which are sent to Arduino to control Servos.
Connections:

As per the diagram, connect the vcc of both servos to 5v on Arduino. Connect Gnd of both servos to Gnd of arduino. The signal wires of one servo connects to pin 3 and other to pin 5 which are PWM enabled pins.
The joystick’s Vcc connects to 5v of Arduino and Gnd connects to Gnd pin. The signal wires i.e Xout and Yout connects to A0 and A1 respectively.
Codeing:
After the connections, final part is programming the Arduino. For that, open the Arduino IDE and write the following code:
#include
Servo servo1;
Servo servo2;
int xaxis = 0;
int yaxis = 1;

int val;

void setup()
{
servo1.attach(3);
servo2.attach(5);
}

void loop()
{
val= analogRead(xaxis);
val = map(val, 0, 1023, 0, 180);
servo1.write(val);

val= analogRead(yaxis);
val = map(val, 0, 1023, 0, 180);
servo2.write(val);
}
Next connect the Arduino to your computer and upload the code.
Testing:

Moving the joystick around will make the pan-tilt mechanism change directions. This is a fun project and can be used in many applications. It can be used for making adjustable camera or laser turret. Try it out and make something cool with it ?
That’s all for this tutorial. If you have any questions, feel free to ask in the comments section.


